

YES, It's here and to me... SO exciting.
This lovely gem is something I've been wanting to make FOREEEVER. This is one of the first projects I wanted to do once we bought our home. I am extremely crafty (if you couldn't tell by now) and this was a must for one of our spare bedrooms! I kind of took over one of the rooms into my "craft room". Well, that is until little babies start running around, and no I don't know when that'll happen ;). It really wasn't that expensive to "build" and didn't take any time at all to put together. Unfortunately for Bryan (my husband) he got recruited to help put the side storage tables together. Surprisingly it was very easy and we put it together literally in 15 min, for both. Usually when you grab those in box furniture do-dads from Walmart or Target it takes an army of brains to figure out how to put together. Not these little babies! Now, if you're like me and want a great work space, or maybe use it as a custom desk or something this is perfect for you. Continue reading on if you want to see how I did it in a couple of days. :)

First things first... I bought two of these espresso square 4 Cube Organizer's from Walmart for $34. I thought about using the three shelf bookcases that they have there for $19 (which would work perfectly as well), but they didn't have the color I wanted and I'm very impatient when I have a vision in my head. Plus, Bryan was like "um, you should get these, they're sturdier." So taking my man's advice since I'm no genius when it comes to building stuff I got these guys. More expensive? Yes. Stronger? YES. = better work space.

Door from Lowe's. #0010710 "LAUAN FLUSH" dementions 1-3/8" HC36" X 80"


For a table top I decided to go with a plain ol' door. We were at Lowe's and I just so happened to see this beaut for $10 on clearance in the door section. Success. As soon as I saw it, I knew this project was going down. I'm not the type of person to buy stuff full price. Most of the time I buy everything on clearance if I can. This door was what made the project go boom, in a good way. Basically because I knew that I had something great to work with.

Look familiar? Yup, it's left over awesomeness from my DIY Dresser Makeover . <-- be sure to check that out. Anyways, details are:
- Martha Stewart Living Metallic Paint in Thundercloud (Home Depot) $4
- Behr Stain Blocking Primer & Sealer (Home Depot) $7
- Minwax Fast Drying Polyurethane Clear Coat (Walmart) $7

Bought the paint pans, roller, and roller pad at Walmart. I think the paint pan was $1.89 and the Roller was $3, and then the extra roller pads were $3. Also snagged some "L" brackets from Lowe's, pack of 4 (with screws) for $2. The roller pads I got are the "Ultra Smooth Surfaces". Pretty much perfect for this bare door.

I primed the door (just the top and sides) about 3 coats. Waited 45 min in between coats to dry completely. Then with a new roller brush pad I painted the door with the Thundercloud paint.... now that took about 3-4 coats as well. I like things to be very pigmented and opaque so I like to make sure it's definitely on there.


Now, for the Polyurethane Clear Coat (which was a smell I didn't like), I did 3 coats of this as well. This took probably the most time out of everything. When it's drying it takes forever, like pull your hair out with boredom forever. So I did as many as I could one day, let it dry over night and did the last coat. I used one of the ultra smooth roller pads as well for this. It made the perfect glossy look, and will also help protect the paint and door from water && other liquids etc.


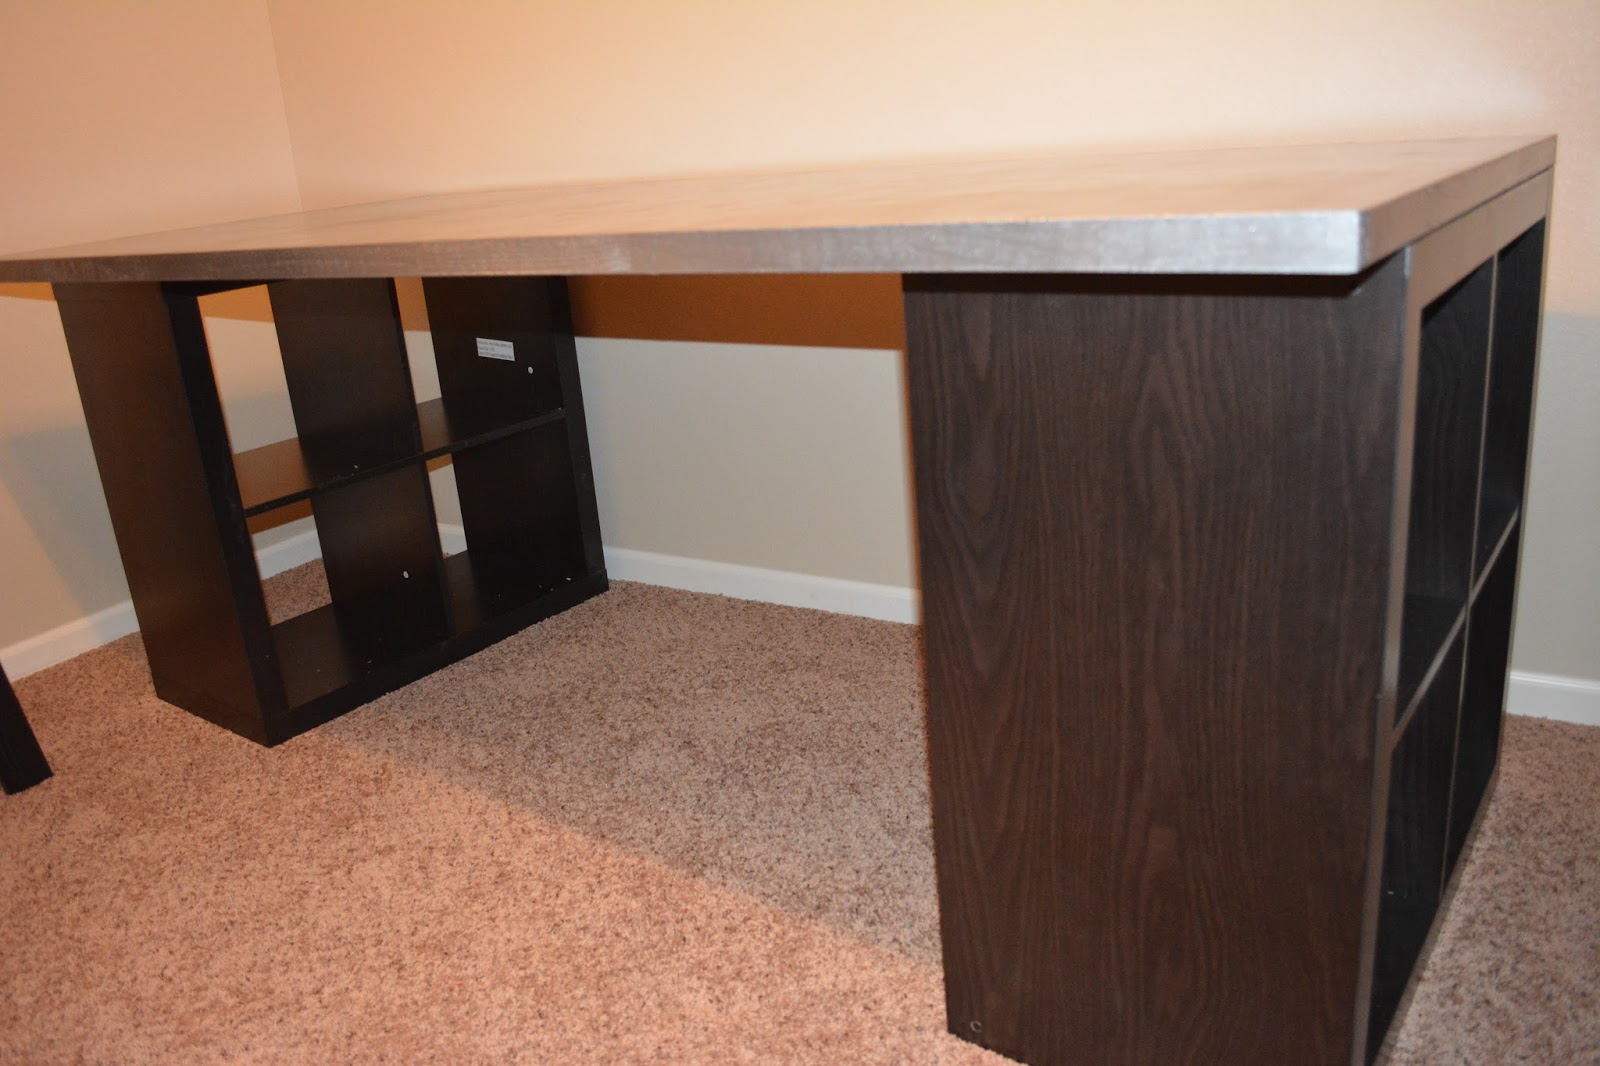
After completely drying comes the L brackets. I pre-drilled the holes first and then drilled the screws into the door, and insides of the storage table thingys. Make sure you do the inside of the tables so it's not so noticeable. AND before drilling everything make sure the table top is exactly where you want it placed on the storage bin thinga-mabobs. My husband was working for this part, and it was a pain to make sure they were staying in place so if you can get an extra sturdy hand to hold them suckers in their place that would be best. BUT, you can do it on your own... hence the D-I-Y (do it yourself) lol. :)


OMG. Most expensive part of this whole project was picking out a chair. I wanted to re-do a chair found on Craigslist or something but....I'm impatient with excitement. So, I bought this bad boy at TJ Maxx for $89 on clearance (ha, love my clearance). I had a $10 off coupon so the actual price was $99 before the coupon. Completely worth the price in my opinion. It's beautiful, extremely comfortable, stylish, and perfect for this space. Pretty sure it's made by Cynthia Rowley. This is optional obviously, but I thought I'd share my love for this expensive butt cushion. I'm kind of obsessed if you couldn't tell. . .


LOL, please excuse the dirty printer that was sitting in it's box for a couple months in storage. Hey, at least it has a special place now. But that's it! It's super sturdy and perfect for all my DIY's, crafts, or whatever I want to use it for. Eating cake on? I don't know it's awesome. I also added little shelves, and I got those at Target on clearance for $4 for both. I put the one in the middle so I could put my tablet there if I wanted to watch a YouTube video or music etc. Sooo yup, thanks for stopping by and reading another DIY post from yours truly. Have any questions or comments? Post below!
Until Next Project.....
